Pages

Sunday 30 June 2013

Angel Desires

This Tut was written by me on the 30th June 2013

Supplies Needed

Font of choice

Mask of choice

Scrapkit- Angel Desires by  Inzpired Creationz


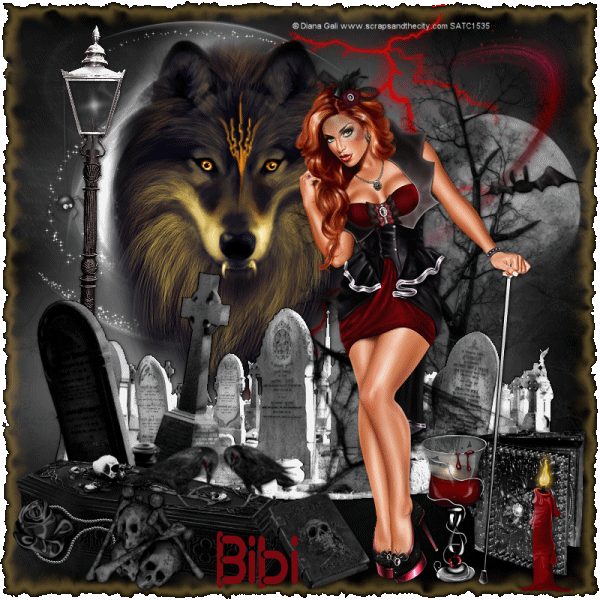
Tube of choice - I am using the artwork of Zlata_M

You must have a proper licence to use this work.

You can get it Here

Drop shadow 1,1,65,5

Open blank image 700 x700

After resizing, adjust, sharpness, sharpen.

New raster layer,select all, copy and paste paper 7 into selection, select none, apply mask, merge group.

Copy frame2, paste as a new layer, add drop shadow.

Using magic wand, click inside frame, select modify expand by 5,paste paper 6 as new layer, select invert delete.

Arrange move down.

Keep selected, add tube, duplicate, select original tube layer, delete , select none.

Select duplicate tube layer, arrange, move up.

Using eraser, carefully erase any of the tube on the bottom part of the frame.

Add ribbon 4, resize 60%, arrange move down, add drop shadow.

Add scattered jewels, image flip , resize 40%, add drop shadow.

Add lolli1, resize 60%, free rotate left, add drop shadow.

Add bow1, resize 30%,  add drop shadow.

Add hat, resize 40%, add drop shadow.

Add shoe2, resize 35%,  add drop shadow.

Add teddy1, resize 40%, image mirror, add drop shadow.

Resize to your liking, add copyright and name, save as a jpeg

Dark Tiffany


This Tut was written by me on the 30th June 2013

Supplies Needed

Font of choice

Mask of choice

Scrapkit- Dark Tiffany by Disturbed Scraps

You can find it Here

Tube of choice - I am using the artwork of Ninaste

You must have a proper licence to use this work.

You can find it Here

Drop shadow 1,1,65,10

After resizing > adjust sharpness > sharpen.

Open blank image 700 x700, flood fill with colour of choice.

New raster layer, select all, copy and paste paper 6 into selection, select none, apply mask, merge group.

Add element 132, add drop shadow.

Add element 12, resize 80%, duplicate, image mirror, add drop shadow.

Add element 121, resize 50%, duplicate, image mirror, merge down,  add drop shadow.

Using magic wand,  select inside the frame, select, modify, expand by 4,  paste paper 10 as a new layer, select, invert, delete, 

arrange move down, add drop shadow.

Add tube as a new layer, position inside left frame, delete, blend - difference.

Mirror tube, paste as new layer, position inside right frame, delete, blend - luminance legacy, select none.

Add element 31, resize 50%, image mirror, add drop shadow.

Add element 14, resize 50%, free rotate right,  add drop shadow. 

Add tube , resize, add drop shadow.

Add element 52, resize 70%, add drop shadow.

Add element 86,  image mirror, add drop shadow.

Add element 71, resize 35%, add drop shadow.

Add element 46, reize 50%, add drop shadow.

Add element 62, resize 30%, free rotate left, add drop shadow.

Add element 55, resize 40%, add drop shadow.

Add element 38, resize 40%, add drop shadow.

Add element 36, resize 40%, duplicate, image mirror.

Add element 115, resize 80%.

Add element 73, resize 50%,add drop shadow.

Add name and ©, resize to your liking .

Sea Adventure - PTU

This Tut was written by me on the 30th June 2013

Supplies Needed

Font of choice

mask of choice

Scrapkit- Sea Pirate by Disturbed Scraps

You can find it  Here

Tube of choice - I am using the artwork of Diana Gali

You must have a proper licence to use this work.

You can find it Here

Drop shadow 1,1,65,5

After resizing > adjust sharpness > sharpen.

Open blank image 700 x 700, flood fill with colour of choice.

New raster layer, select all, copy and paste paper 10 into selection, select none, apply mask, merge group.

Add element 113, duplicate, image mirror, add drop shadow.

Add element 120,resize 80%, add drop shadow.

Add element 97, resize 70%, add drop shadow.

Using freehand selection,  draw around the frame,  paste paper 11 as a new layer, select, invert, delete, arrange move down, add drop shadow.

Add tube as a new layer, delete, blend luminance legacy.

Keep selected, add tube, duplicate, on original layer, delete, select none.

Select copy of tube, arrange, move up, using eraser, carefully remove bottom part of tube.

Add element 36, resize 60%, add drop shadow.

Add element 80, resize 60%, add drop shadow. 

Add element 16, resize 50%, add drop shadow.

Add element 42,  resize 60%, add drop shadow.

Add element 28, resize 30%, add drop shadow.

Add element 20, resize 60%, add drop shadow.

Add element 35, resize 40%, add drop shadow.

Add element 33, resize 40%, add drop shadow.

Add element 39, resize 30%, add drop shadow.

Add element 47, resize 60%, duplicate, image mirror.

Add element 2, resize 35%, add drop shadow.

Add element 5, resize 40%, image mirror, add drop shadow.

Add element 78, resize 30%, add drop shadow.

Add element 4, resize 30%, add drop shadow.

Add name and ©, resize to your liking .

Saturday 29 June 2013

Gothic Rave - PTU

This Tut was written by me on the  29th June 2013

Supplies Needed

Font of choice

Mask of choice

Eye Candy 4000 

Animation Shop

Scrapkit - Goth Rave by Design by Joan

You can get it  Here

Tube by Danny Lee 

You can get it Here

Drop shadow 1,1,60,5.

After resizing > adjust sharpness > sharpen.

Open blank image 700 x 700, floodfill with white.

New raster layer, select all, copy and paste paper 4 into selection, select none,apply mask, merge group.

Add element 117, add drop shadow.

Add element 76, resize 60%, add drop shadow.

Add element 1, resize 80%, add drop shadow.

Add element 6, resize 80%,  add drop shadow.

Add element 89,  add drop shadow.

Add element 5,  resize 70%,  add drop shadow.

Add element 7, resize 80%,  free rotate right, add drop shadow.

Add element 19, resize 50%, add drop shadow. 

Add element 5, resize 70%, add drop shadow.

Add element 103,  add drop shadow.

Add element 104,  add drop shadow.

Add element 40, resize 40%, add drop shadow.

Add element 79, resize 50%, add drop shadow.

Add element 115, resize 50%, image mirror, add drop shadow.

Using freehand tool, carefully draw around the smoke, duplicate x 2, rename smoke 1, 2 and 3.

Select smoke 1, apply Eye Candy smoke with the following settings.


Repeat for 2 & 3, hitting the random seed button.

Add element 86, resize 70%, duplicate, image mirror.

Add element 118, resize 50%, add drop shadow.

Add element 111, resize 50%, add drop shadow.

Add tube, resize, add drop shadow.

Add element 35, resize 50%, blend - screen.

Add element 64, resize 40%, add drop shadow.

Add element 48, resize 60%, add drop shadow.

Add name and ©, resize to your liking .

Animation

Close of smoke 2 & 3, copy merged, paste as a new animation.

Close smoke 1, open smoke 2, copy merged, paste after current frame.

Close smoke 2, open smoke 3, copy merged, paste after current frame.

Save as a gif.

Film Night - PTU


This Tut was written by me on the  29th June 2013

Supplies Needed

Font of choice

Mask of choice

Eye Candy Impact - backlight

Eye Candy 4000 HSB Noise

Animation Shop

Scrapkit - Festive Evening by Sky Scraps 

You can find it - Here

Tube by Barbara Jensen 

You can find it  Here

Drop shadow 1,1,50,5.

After resizing > adjust sharpness > sharpen.

Open blank image 600 x 600, floodfill with white.

New raster layer, select all, copy and paste paper 1 into selection, select none,apply mask, merge group.

Add element 17,  resize 80%..

Add element 55, resize 80%, add drop shadow.

Add element 6, resize 50%, add drop shadow.

Add element 26, resize 50%, free rotate left, add drop shadow.

Using magic wand, click inside each of the fames, select, modify expand by 3, paste paper 2 as a new layer, select, invert, delete.

Arrange, move down.

Keep selected, paste your tube as a new layer, position,  delete.

Repeat for the other 2 frames, select none. 

Merge down x 2, adjust hue and saturation, both set to 0.

Add element 4,  resize 70%, add drop shadow.

Add element 68,  resize 60%,  add gradient glow.

Add element 59, resize 30%,  add drop shadow.

Add element 52, resize 30%, add drop shadow. 

Add element 1, resize 60%, add drop shadow.

Using freehand selection tool, draw out a cone shape from the camera lens, add a new layer, apply Eye Candy backlight with the following settings - settings tab select Filled - Decreasing Opacity.


Duplicate twice, rename ani 1, 2 & 3.

On ani1, apply Eye Candy 4000 HSB Noise with following settings.


Repeat for ani2 &3, hitting the random seed tab, select none.

Add element 5, resize 60%, add drop shadow.

Add element 7, resize 50%, add drop shadow.

Add tube, resize, add drop shadow.

Add element 79, resize 40%, add drop shadow.

Add name and ©, resize to your liking .

Animation

Close of ani 1 & 2, copy merged, paste as a new animation.

Close ani 1, open ani 2, copy merged, paste after current frame.

close ani 2, open ani 3, copy merged, paste after current frame.

Save as a gif.


Friday 28 June 2013

Sexy Pirate - PTU

This Tut was written by me on the 28th June 2013

Supplies Needed

Font of choice

Mask of choice

Scrapkit- Sea Pirate by Bibi's Collection 

You can find it at Here

Tube of choice - I am using the artwork of Diana Gali

You must have a proper licence to use this work.

You can get it Here

Drop shadow 1,1,65,5

After resizing > adjust sharpness > sharpen.

Open blank image 700 x 700, flood fill with colour of choice.

New raster layer, select all, copy and paste paper 12 into selection, select none, apply mask, merge group.

Add element 13, resize 60%, move to top left of canvas..

Add element 79, resize 60%.

Add element 14, resize 70%, add drop shadow.

Add element 72, resize 80%, add drop shadow. 

Using magic wand, click inside element, select, modify , expand by 5, paste paper 1 as a new layer, select , invert, delete.

Arrange move down, keep selected , add element 73, resize 35%, select none.

Add element 88, resize 80%, add drop shadow.

Add element 15,  add drop shadow.

Add element 12, resize 80%,add drop shadow.

Add element 93, resize 50%, add drop shadow.

Add tube , resize, add drop shadow.

Add element 86, resize 60%, add drop shadow.

Add element 81, resize 60%,  add drop shadow.

Add element 59, resize 60%, add drop shadow.

Add element 21, resize 40%, add drop shadow.

Add element 29, add drop shadow.

Add element 97, resize 60%, add drop shadow.

Add element 107, resize 40%, add drop shadow.

Add element 95, resize 60%, add drop shadow.

Add element 63, resize 50%, image mirror,  add drop shadow.

Add element 80, resize 80%, add drop shadow.

Add element 27, resize 60%, add drop shadow.

Add element 58, resize 30%, add drop shadow.

Add element 112, add drop shadow.

Add element 99, add drop shadow.

Add element 17.

Add element 65.

Add name and ©, resize to your liking .

Thursday 27 June 2013

Get Punky - PTU


This Tut was written by me on the 27th June 2013

Supplies Needed

Animation 2 white swirl by - Lovey

Font of choice

Mask 152 by  - Gem

Scrapkit- Rasta Punk by Bibi's Collection 

You can find it Here

Tube of choice - I am using the artwork of Danny Lee

You must have a proper licence to use this work.

You can get it Here

Drop shadow 1,1,65,5

After resizing > adjust sharpness > sharpen.

Open blank image 700 x 700, flood fill with colour of choice.

New raster layer, select all, copy and paste paper 1 into selection, select none, apply mask, merge group.

Duplicate, image mirror, image flip, merge down.

Add element 20, resize 60%,duplicate, image mirror, image flip, merge down.

Add element 64, move to top centre of canvas..

Add element 51, resize 35%, free rotate left, 15%, duplicate image mirror, add drop shadow.

Using magic wand click inside left frame, select modify expand by 4, paste close up of tube as a new layer, select invert, delete, select none, arrange move down, blend  - luminance legacy.

Repeat for right frame, but change blend to hard light.

Close of bottom 3 layers, merge visible.

Add element 71, resize 70%, add drop shadow.

Add element 12, resize 70%, add drop shadow. 

Add element 73, resize 50%, add drop shadow.

Add element 13,  add drop shadow.

Add element 38, resize 70%, free rotate right, add drop shadow.

Add element 24, add drop shadow.

Add element 73, resize 70%, free rotate left, add drop shadow.

Add element 2, resize 35%, image mirror, add drop shadow.

Add element 67, resize 70%, add drop shadow.

Add tube resize, add drop shadow.

Add name and ©, resize to your liking .

Animation

Copy merged, paste as a new animation, duplicate until you have 21 frames, edit select all.

Open up 2 white swirl animation, resize 60%, edit, select all, edit copy.

Click on 1st frame and drag to 1st frame of your tag, release when you are happy with the position.

Save as gif.

Tuesday 25 June 2013

Waking the Vampire - PTU

This Tut was written by me on the 25th June 2013

Supplies Needed

Font of choice

Mask of choice

Flashball animation by  Lovey

Animation shop

Scrapkit- Black Widow by Disturbed Scraps 

You can find it Here

Tube of choice - I am using the artwork of Diana Gali

You must have a proper licence to use this work.

You can get it Here

Drop shadow 1,1,65,5

After resizing > adjust sharpness > sharpen.

Open blank image 700 x 700, floodfill with white.

New raster layer, select all, copy and paste paper 1 into selection, select none, apply mask, merge group.

Add element 2, resize 40%,add drop shadow.

Add element 134, resize 80%, add drop shadow.

Add element 20, resize 80%, add drop shadow .

Add element 14, resize 35%, duplicate, resize 75%, merge down, duplicate, image mirror, add drop shadow.

Add element 110, resize 70%, image mirror, add drop shadow.

Add element 29, resize 60%,  blend mode screen..

Add element 130, resize 60%, image mirror, add drop shadow.

Add element 146.

Add element 21,  resize 30%, add drop shadow. 

Add element 11, resize 30%,  add drop shadow.

Add element 6, resize 60%, add drop shadow.

Add element 10, resize 30%, add drop shadow.

Add element 4, resize 50%,  add drop shadow.

Add element 23, resize 30%, add drop shadow.

Add element 32, resize 30%, add drop shadow.

Add element 13, resize 25%, add drop shadow.

Add element 132, resize 60%, add drop shadow.

Add element 106, resize 40%, add drop shadow.

Add element 26, resize 40%, add drop shadow.

Add name and ©, resize to your liking .

Animation

Copy merged, paste as a new animation.

Open  flashball animation, resize 40%.

Duplicate your tag until you have 12 frames, select all.

Click on animation, edit, select all, edit copy, drag 1st frame of animation onto 1st frame of your tag, position and release.

Save as gif.


4th July Celebrations - PTU


This Tut was written by me on the 25th June 2013

Supplies Needed

Font of choice

Mask of choice

Firework animation 473 by Simone

Animation shop

Scrapkit- July 4th by Bibi's Collection 

You can find it Here

Tube of choice - I am using the artwork of Danny Lee

You must have a proper licence to use this work.

You can get it Here

Drop shadow 1,1,65,5

After resizing > adjust sharpness > sharpen.

Open blank image 700 x 700, floodfill with white.

New raster layer, select all, copy and paste paper 4 into selection, select none, apply mask, merge group.

Add element 50, resize 50%,add drop shadow.

Using magic wand click inside frame, select, modify expand by 5, paste paper 7 as a new layer, select, invert, delete.

Arrange, move down.

Keep selected, add close up tube, delete, select none, blend- luminance legacy.

Add element 51, resize 50%, add drop shadow.

Repeat the above steps as for element 50, but use paper 9.

Add element 25, add drop shadow .

Add element 36, resize 45%, add drop shadow.

Add element 66, resize 70%,  add drop shadow.

Add element 21, resize 40%, add drop shadow.

Add tube, resize, add drop shadow.

Add element 33,  resize 50%, add drop shadow. 

Add element 22, resize 40%,  add drop shadow.

Add element 40, resize 40%, add drop shadow.

Add element 32, resize 40%, add drop shadow.

Add element 23, resize 50%, image mirror, add drop shadow.

Add element 39, resize 60%, add drop shadow.

Add name and ©, resize to your liking .

Animation

Merge mask layer and background layer, copy and paste as a new animation.

Control - L until you have 16 frames, edit select all.

Open firework animation, edit select all, edit copy, clcik on 1st frame and drag onto your tag, position, release.

Repeat x 2.

Close mask layer, copy merged, paste as a new animation.

On 1st animation, edit, select all, edit propogate, paste, click on merged tag, edit, copy, click on animation, edit paste into selected frame.

When you are happy with position, release.

Select all, animation, frame properties -18.

Save as gif.

Monday 24 June 2013

Military Babe - PTU

This Tut was written by me on the 24th June2013

Supplies Needed

Font of choice

Mask of choice

Scrapkit- Military by Bibi's Collection 

You can find it Here

Tube of choice - I am using the artwork of Danny Lee

You must have a proper licence to use this work.

You can find it Here

Drop shadow 1,1,65,5

After resizing > adjust sharpness > sharpen.

Open blank image 700 x 700

New raster layer, select all, copy and paste paper 1 into selection, select none, apply mask, merge group.

Add element 81, resize 60%, move to top left of canvas.

Add element 37 .

Add element 8, resize 50%, add drop shadow.

Add element 59, resize 50%,  add drop shadow.

Add element 56, resize 45%, add drop shadow.

Add element 61,  resize 60%, add drop shadow. 

Add element 20, resize 50%, image mirror, add drop shadow.

Add element 24, resize 60%, add drop shadow.

Add element 54, resize 70%, add drop shadow.

Add element 22, resize 50%, add drop shadow.

Add element 51, resize 35%, add drop shadow.

Add element 45, resize 60%, add drop shadow.

Add element 32, resize 60%, add drop shadow.

Add element 48, resize 60%, add drop shadow.

Add element 11, resize 40%, add drop shadow.

Add element 4, resize 60%, add drop shadow.

Add element 6, resize 70%, add drop shadow.

Add element 38, resize 35%.

Add element 52, resize 40%, add drop shadow.

Add tube, resize, add drop shadow.

Add name and ©, resize to your liking and save.

Black Queen - PTU


This Tut was written by me on the  24th June 2013

Supplies Needed

Font of choice

Mask of choice

Scrapkit - Cruela by Sky Scraps

You can buy it Here

Tube by Zlata_M 

You can buy it Here

Drop shadow 1,1,65,6.

After resizing > adjust sharpness > sharpen.

Open blank image 800 x 800.

New raster layer, select all, copy and paste paper 1 into selection, select none,apply mask, merge group.

Add element 85,  move to top right of canvas.

Add element 86, resize 80%, move to left of canvas.

Add element 24, resize 80%, add drop shadow..

Add element 29,  resize 60%, add drop shadow.

Add element 3,  add drop shadow.

Add element 45, resize 70%,  add drop shadow.

Add element 72, resize 60%, add drop shadow. 

Add tube, resize, add drop shadow.

Add element 1, resize 30%, duplicate, image mirror, add drop shadow.

Add element 25, resize 60%, add drop shadow.

Add element 13, resize 60%, add drop shadow.

Add element 14, resize 50%,  add drop shadow.

Add element 2, resize 40%, add drop shadow.

Add element 55, resize 60%, add drop shadow.. 

Add element 64, resize 40%, add drop shadow.

Add element 1, resize 30%, add drop shadow.

Add element 63, resize 40%, add drop shadow.

Add name and ©, resize to your liking .

Army Wife - PTU

This Tut was written by me on the  24th June 2013

Supplies Needed

Font of choice

Mask of choice

Scrapkit - Army Girl by Sky Scraps

You can buy it Here

Tube by Ismael Rac 

You can buy it Here

Drop shadow 1,1,65,6.

After resizing > adjust sharpness > sharpen.

Open blank image 800 x 800.

New raster layer, select all, copy and paste paper 22 into selection, select none,apply mask, merge group.

Add element 50,  add drop shadow.

Add element 3, resize 70%, add drop shadow.

Add tube resize, add drop shadow.

Add element 2, resize 70%, add drop shadow..

Add element 13,  resize 50%, add drop shadow.

Add element 6,  resize 50%,  add drop shadow.

Add element 57, resize 60%,  add drop shadow.

Add element 55, resize 40%, add drop shadow. 

Add element 4, resize 50%, image mirror, add drop shadow.

Add element 8, resize 50%, add drop shadow.

Add element 53, duplicate, image mirror, add drop shadow.

Add element 5, resize, 60%, free rotate left, add drop shadow.

Add element 11, resize 60%, add drop shadow.

Add element 66, resize 30%, add drop shadow.. 

Add element 73, resize 30%, add drop shadow.

Add name and ©, resize to your liking .


Sunday 23 June 2013

Dark Fairytale - PTU


This Tut was written by me on the  23rd June 2013

Supplies Needed

Font of choice

Mask of choice

Xenofex Burnt Edges

Scrapkit - Dark Fairytale by Bibi's Collection

You can buy it  - Here

Tube by Anna Marine  you can buy it Here

Drop shadow 1,1,65,6.

After resizing > adjust sharpness > sharpen.

Open blank image 800 x 800.

New raster layer, select all, copy and paste paper 2 into selection, select none.

Add element 92,  move to botom  left of canvas, merge down.

Apply Xenofex Burnt Edges at default setting.

Add Ement 22, resize 60%.

Add element 76, resize 80%.

Add element 21, resize 50%.

Add element 40, resize 50%, add drop shadow.

Add element 99,  resize 50%, duplicate x 2, add drop shadow.

Add element 88, resize 40%, duplicate, image mirror, duplicate, resize 70%, add drop shadow.

Add element 1, resize 30%, add drop shadow.

Add element 88, resize 60%, add drop shadow. 

Add element 73, resize 35%, add drop shadow.

Add element 70, resize 40%, add drop shadow.

Add tube, resize, add drop shadow.

Layers, merge visible, resize to liking.

Add name and ©.

Friday 21 June 2013

Vampire Widow - PTU

This Tut was written by me on the  21st June 2013

Supplies Needed

Font of choice

Mask of choice

Xenofex Constellation

Animation Shop

Snap Flash1 animation by Lovey - Here

Scrapkit - Vampire Widow by Bibi's Collection

You can buy it  Here

Tube by Diana Gali 

You can buy it  Here

Drop shadow 1,1,65,6.

After resizing > adjust sharpness > sharpen.

Open blank image 800 x 800.

New raster layer, select all, copy and paste paper 6 into selection, apply Xenofex Burnt edges with the following settings.


Add element 71,  move to top left of canvas.

Add element 39, move to top right of canvas.

Add element 62, resize 60%, image mirror.

Add element 37, resize 60%, add drop shadow..

Add element 14,add drop shadow.

Add element 65,  resize 80%, image mirror, add drop shadow.

Add element 128, resize 50%, add drop shadow.

Add element 83, resize 60%, add drop shadow. 

Add element 103, add drop shadow.

Add element 115, resize 40%, add drop shadow.

Add element 69, resize 30%, add drop shadow.

Add element 28, resize, 60%, add drop shadow.

Add element 67, resize 60%, add drop shadow.

Add element 46, resize 60%, image mirror. 

Add element 32, resize 25%, add drop shadow.

Add element 50, resize 50%, add drop shadow.

Add tube, resize, add drop shadow.

Add name and ©.

Animation.

Open Animation Shop

Copy merged, paste as a new animation, resize to 600 x 600

Duplicate until you have 3 frames.

Open flash animation, resize 50%.

Click on original tag, select all.

 Click on animation, select all, copy, click on 1st frame and drag onto your canvas, place in position and release.

Frame properties 18.

Save as gif.